How Can We Help?
How to write a simple Blog post
Here is a simple guide to adding a blog article/post to your WordPress website.
This is something we usually provide in WordPress Training, but in these usual times, we wrote this.
A blog post is basically the same as a Page, except you tend not to have such fancy layouts, and it appears in the Blog area of your site, rather than as a Page, that you have to assign to the menus.
We won’t go into the background of blogs, this is about where to go on the website to write one, Edit one and Publish it.
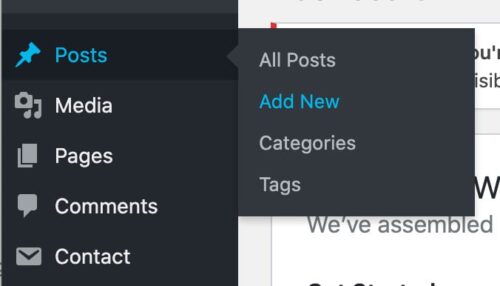
Login to your website
First things first: login. We cannot direct you to yours, but if you are reading this, you likely have a login to the right area already. Once you are logged in, down the left, go to Posts > Add New.
Clicking Add New will take you to a blank Posts page.

‘Add title’: this is obviously the title of the blog article. It will also serve as your ‘Header 1’, so do not select that anywhere else. When you have entered it, and click in the box below it, after a short time you will see the ‘URL’ of this page dynamically appear.
The rest is much like MS Word, where you type in your article, with Bold or Italic or whatever. But it’s also easy to add images (Add Media).
Type in your article. You will see ‘Paragraph’ in a dropdown menu. If you click that Dropdown you get Header options. This goes into the realms of SEO, but a Header Two will be a subheading, and a Header Three will be a sub heading… of header two. We won’t go too deeply into this for now.
So let’s say you have typed in a Paragraph of text and you want to add an image to that part of your article. It’s easy.
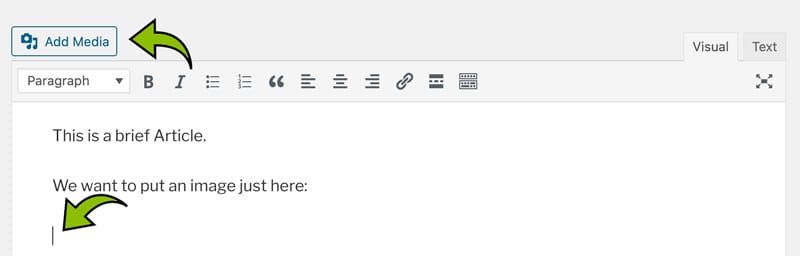
You position your cursor, then click ‘Add Media’.
Once you click this, you will be shown this popup:
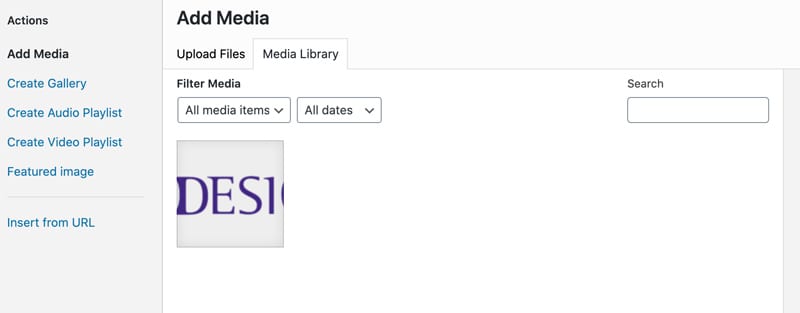
From here, you can select an image from the ‘Media Library’, and choose to Insert Image, or ‘Upload Files’. From there you can Browse your computer to upload, or drag’n’drop an image from your PC into the box on screen. It will then appear in the Media Library tab. This is where you select the image, and Insert.
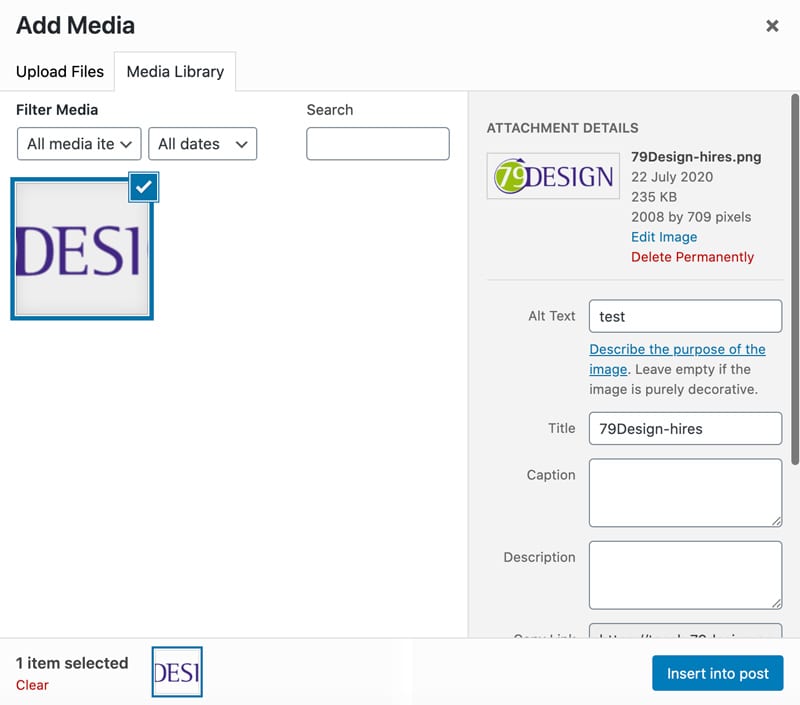
With image selected, click ‘Insert into Post’, and the image will appear on screen.
You might for now want to Save the product, and check how it looks online. You can ‘Preview’ your product. At the top right of this screen is a a section for ‘Publish‘. In there is a ‘Save as Draft’. Do that now. Then click Preview to see how it looks. When you are happy, click Publish.