How Can We Help?
How to add a Simple Product to WooCommerce
Depending on your WordPress theme, here is a simple guide to adding a simple product to your WooCommerce store.
A Simple product, as Woocommerce calls it, is one there is no variables for the product. It’s like buying “a turntable”. It’s just a single turntable. There is no size, no colour. It’s a turntable.
Add Product
In your WP Dashboard, hover over Products and select Add New.

At the top is your Product name. Enter the title in there (keep it brief though). Shortly after you do, you will see the ‘URL’ (called a permalink) appear just below. Don’t worry about that for now.
In the box that’s tab labelled as ‘Visual’, enter the full description of your product. This is what will be shown in the main Description Tab of your live consumer product page. There is a button to ‘Add Media’, but don’t worry about that for now. We’ll keep things simple.
Short Description
Depending on the layout of your ‘Add a Product’ page, further down you will see the Short Description as shown here.
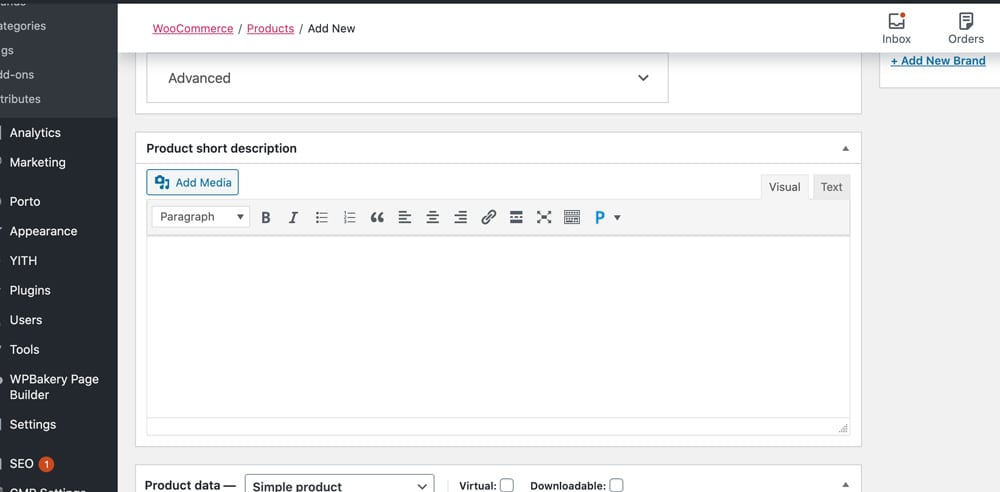
This is the area you add that brief description which will (depending on your theme) show on the right of your consumer page, below the Price, but before the ‘Add to Basket’ button. This is perhaps suitable for 1-2 paragraphs.
Now onto the Product Type
This is where we tell WooCommerce the type of product this is.
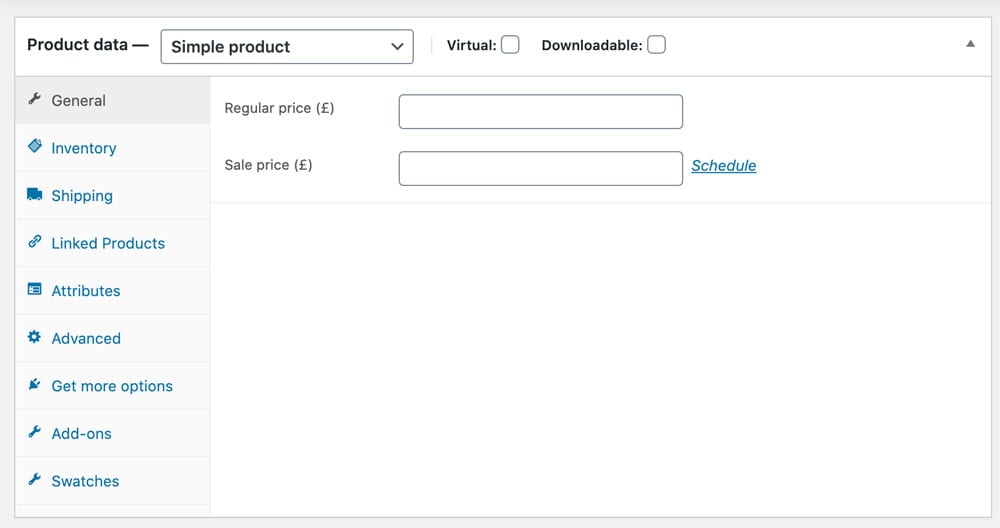
Just enter the Regular price of this product. If it is on sale, then as you can see, there is a Sale price field for that.
Weight?
Unlike Variables which can get complicated, this type of product is super easy to manage. The only additional element might be Shipping, when you may have to enter a Weight. In which case, click on the Shipping Tab, and if your website has a Weight Management tool installed, simple enter the weight in Grams/kgs in the box, so that the system can calculate the price.
Next – which category?
On the right side of the screen you should see all the categories assigned to your store. If none are in there, you can click the blue ‘Add New Category’ button. Else, we will do a tutorial and link here on how to do that.
For now, we will assume they are already set. Check the boxes for the category this is going in. If it’s in a subcategory, check that too. Such as the screen here:
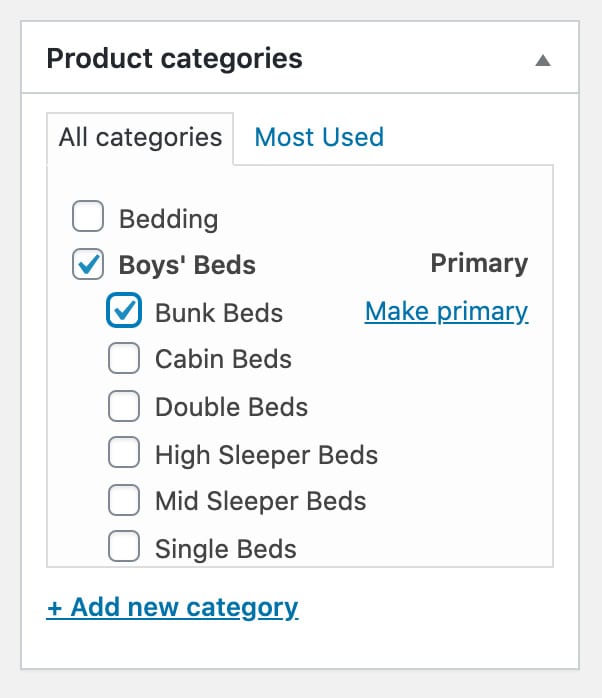
So your categories are now assigned to this product.
Next – adding a main photo
Below the Categories is Tags, and below that is Product Image.
Click Set Product Image and a popup will appear with the Media Library showing first. If you have already uploaded your photo, it will appear in this box somewhere.
If not, click the Upload Files tab.
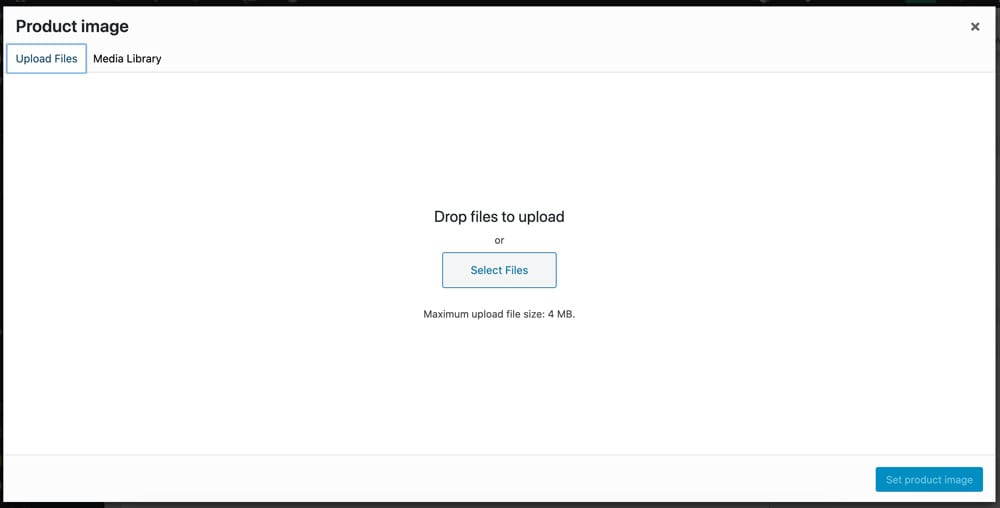
You can drag images from your PC or just ‘Select Files’, and then browse to where your file or files are located. Once selected, click the Open button and the image(s) will upload. Depending on your hosting, or any optimisation software, this can be quick, or slightly slow. You will know when it is complete as you will see a thumbnail of the image(s).
Once uploading, ensure it is select and click ‘Set Product Image’.
The popup will close and the image will appear in the ‘Product Image’ box.
Next, the Gallery.
This is optional. The process is the same, except obviously you can add more than one product.
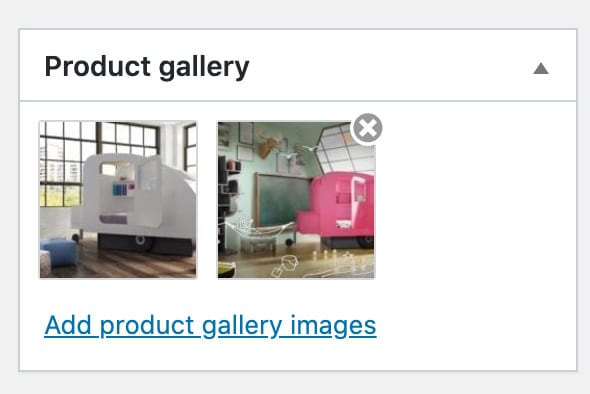
The other clever part about the Gallery, is you can move them around. As you hover your mouse (or tap with your finger) over an image, a ‘x’ will appear. This is to remove it from this gallery. But if you ‘drag’ that image, you can change the order they appear on screen.
Are we done?
So now you have the following set:
- Product title
- Description
- Short Description
- Possibly Weight wet
- Product Category set
- Product photo set.
- Gallery set, and place in desired order.
You might for now want to Save the product, and check how it looks online. You can ‘Preview’ your product. At the top right of this screen is a a section for ‘Publish‘. In there is a ‘Save as Draft’. Do that now.
Then click Preview to see how it looks. When you are happy, click Publish.